Tuesday, October 26, 2010

Choc Chip Cookies

 
I'd never made choc chip cookies before but thought I would give it a go.  After a quick search I found a pretty simple recipe over at Best Recipes.  It also gave me a good excuse to use my new electric mixer!


Ingredients
125g butter
1 cup brown sugar
3/4 cup caster sugar
1 tsp vanilla essence
1 egg
1 1/2 cups self raising flour
3/4 cup choc chips


Preheat oven to 160°C.  Cream butter and sugars.  Mix in vanilla essence and egg.  Sift in flour until well combined, then add choc chips.


As always, you never know what's going to happen the first time you try a new cookie recipe.  The first batch I used too much mixture for each cookie and they flattened out more then I thought they would.  So I ended up with some giant cookies!


The next batch I used about a teaspoon of filling and they turned out just right.  They only take about 10 minutes to cook and were very tasty!

Saturday, September 4, 2010

Steamed Buns

Here is the recipe for the Steamed Buns I made for my Birthday Feast.  Normally these are made with pork as Char Siu Bau at Yum Cha (Dim Sum).  As soon as I saw the recipe in my The Food of the World - A Journey for Food Lovers book, I knew I had to make them!  We just love going to Yum Cha and this is possibly my favourite dish, though there are so many yummy foods it is hard to choose a favourite.  I was very pleased that these worked so well and tasted just like the real thing.  I think they may become a regular item on our menu!  The dough does take some time to prepare, but once it is ready they are very easy to make and well worth it.


Basic Chinese Yeast Dough
3 tbsp Sugar
1 Cup warm water
1 1/2 tsp dried yeast
400g plain flour
2 tbsp oil
1 1/2 tsp baking powder

Place the water, sugar and oil in an electric mixer bowl.  Add flour, make a small well on top and add yeast.  Mix with dough hook attachment until the dough is smooth and elastic, about 8-10 minutes.  If you don't have an electric mixer you can mix with a wooden spoon, then knead dough on a lightly floured surface.  Lightly grease a bowl with some oil, place the dough in the bowl and turn it so that all sides are coated.  Cover with a cloth and set aside to rise in a draught free place for 3 hours.

Uncover the dough, punch it down and turn it out onto a lightly floured surface.  If you are not ready to use the dough, you can wrap it in plastic wrap and place in fridge until ready.  When you are ready to use the it, flatten the dough and make a well in the center.  Place the baking powder in the well and gather up the edges to enclose the baking powder.  Pinch the edges to seal.  Lightly knead the dough for several minutes to evenly incorporate the baking powder.  It is not ready to use.

Red Bean Filling
1 tsp oil
1 can red kidney beans, drained and rinsed.
1 onion, finely chopped
1 small zucchini, finely chopped
3 button mushrooms, chopped
1 tsp sesame oil
2 tsp soy sauce
3 tsp sugar

Heat the oil in a wok or large frypan.  Add the beans and stir fry for about 3 minutes until the beans are soft and breaking up a little.  Add the onion, mushrooms and zucchini and cook for a further 2 minutes.  Add the sesame oil, soy sauce and sugar, cook for a further minute, then leave to cool.

Steamed Buns
Divide the dough into 24 portions.  Press a portion into a circle and place 1-2 tsps of the red bean filling into the middle of the dough.  Fold the sides up to enclose the filling, pinching the top to seal them completely.  Repeat with remaining portions.  Place the buns well apart into a steamer.  Normally this would be done in a bamboo steamer over a wok but as we didn't have any, I just used a vegetable steamer insert over a saucepan of boiling water.  Steam the buns over simmering water for 15 minutes or until the buns are well risen and a skewer inserted into the center comes out hot.

Friday, September 3, 2010

A Birthday Feast

For my Birthday this year, I decided to cook my own special Birthday feast!  As Teena and I both love going to Yum Cha, I wanted to try cooking some myself at home.  I'd found a recipe for Sweet Pork Buns in a book...  It looked easy enough and I wanted to try it as soon as I saw it, so this was a good opportunity to try it out.  So in the end I came up with the following menu:


Vegetarian Spring Rolls, Steamed Sweet Buns, Fried Rice and Hot and Honeyed Chicken Wings


The Vegetarian Spring Rolls were very tasty.  Teena doesn't usually like spring rolls, but she did like these one.  I found the recipe at Taste.com.au.  They were fairly easy to make, but I ended up using all the wrappers and still having a bowl full of vegetables and noodles left over.  We just fried that up for dinner though so it wasn't wasted.  We froze the leftover spring rolls and they cook up just fine after defrosting them.


The original recipe for these Sweet buns were with a pork filling. As Teena is 16 weeks pregnant, we are being careful with the food she is eating.  So I made the filling with red beans instead of pork.  I wasn't sure how these would turn out but I was hopeful as i really love these when we go to Yum Cha!  I'm happy to say they were delicious!  A bit involved as it takes a while to prepare the dough, but once that's done it was fairly easy.  They may not look so great in the picture, I should have taken one opened up...  But they do taste great, the bun is so sweet and soft, and the filling turned out great as well.  You can see the recipe for these here.


I also love fried rice.  This one was a little different then usual with some ginger and shredded Chinese cabbage in it.  It was nice but I prefer the type you get in a restaurant, something I've never really been able to recreate...


These chicken wings are so tasty!  It's really hard to stop eating them...  I've made them before though, so you can see the recipe here.

So needless to say, I had a good birthday :)

Saturday, July 24, 2010

Baked Cheesecake with Passionfruit Topping

Teena loves cheesecake, so for her Birthday this year, I made her this Baked Cheesecake with Passionfruit Topping.  We've decided to only make one cheesecake per year because after a week of eating a whole cheesecake between the two of us... it felt like we put on a few kgs.  Luckily, this year Teena's parents visited her for her Birthday and helped us eat it, so it wasn't so bad.  I had meant to get a few more pictures of the cake after it had been sliced, but it just didn't last long enough :)  This recipe is based on a recipe found here.


Ingredients
Crust
2 cups ground Arnotts Choc Ripple Biscuits
1/2 cup unsalted butter, melted

Filling
900g cream cheese, at room temperature
1 cup caster sugar
Juice from 1/2 lemon, strained
Finely grated zest of 1/2 lemon
2 tsp vanilla extract
4 eggs, separated
1/2 cup heavy cream

Passionfruit Topping
1 tbs cornflour
1/3 cup water
4-5 Passionfruit
1/4 cup caster sugar, extra


Preheat oven to 350 F/180 C. Lightly coat the bottom and sides of an 8-inch (20cm) springform pan with nonstick cooking spray.

To Make the Crust:
In a mixing bowl, combine the biscuit crumbs and the melted butter with a fork until evenly moistened. Spoon the biscuit mixture into the prepared pan and, using the bottom of a glass, press the crumbs down into the base and 1-inch up the sides. Chill crust in refrigerator until ready to fill.

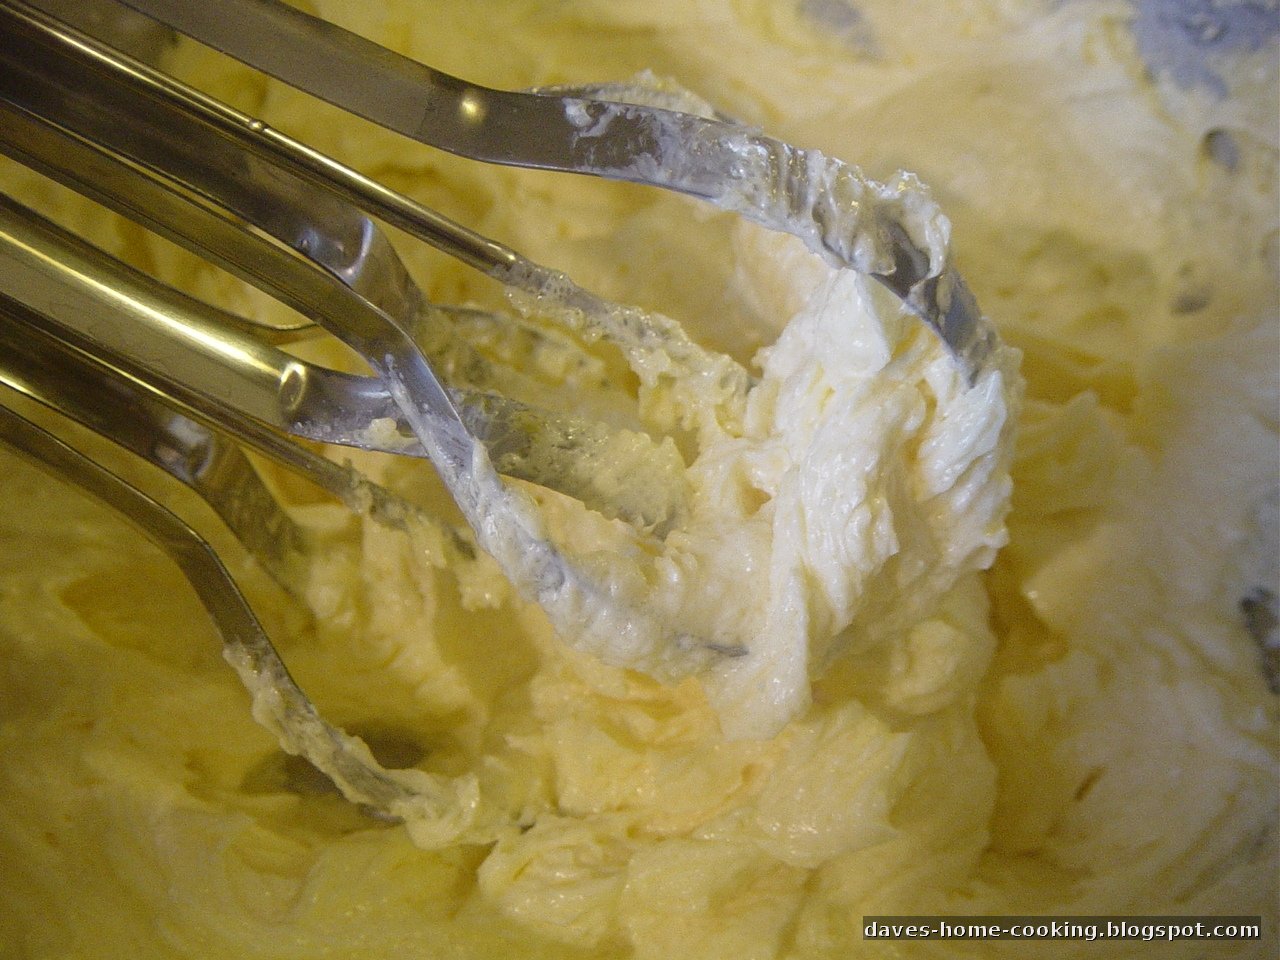
To Make the Filling:
Using an electric mixer, beat the cream cheese on low speed for 1 minute, until smooth and free of any lumps. Add the egg yolks, one at a time, and continue to beat slowly until combined, then beat in cream. Gradually add sugar and beat until creamy, for 1 to 2 minutes. Add the strained lemon juice, lemon zest, and vanilla. Periodically scrape down the sides of the bowl and the beaters. Beat until well combined and the mixture is light and fluffy (the batter should be well combined but not overmixed).

Using clean electric beaters or a balloon whisk, whisk the egg whites in a medium bowl until soft peaks form. Using a large metal spoon, fold beaten egg whites into cream cheese mixture until just combined.

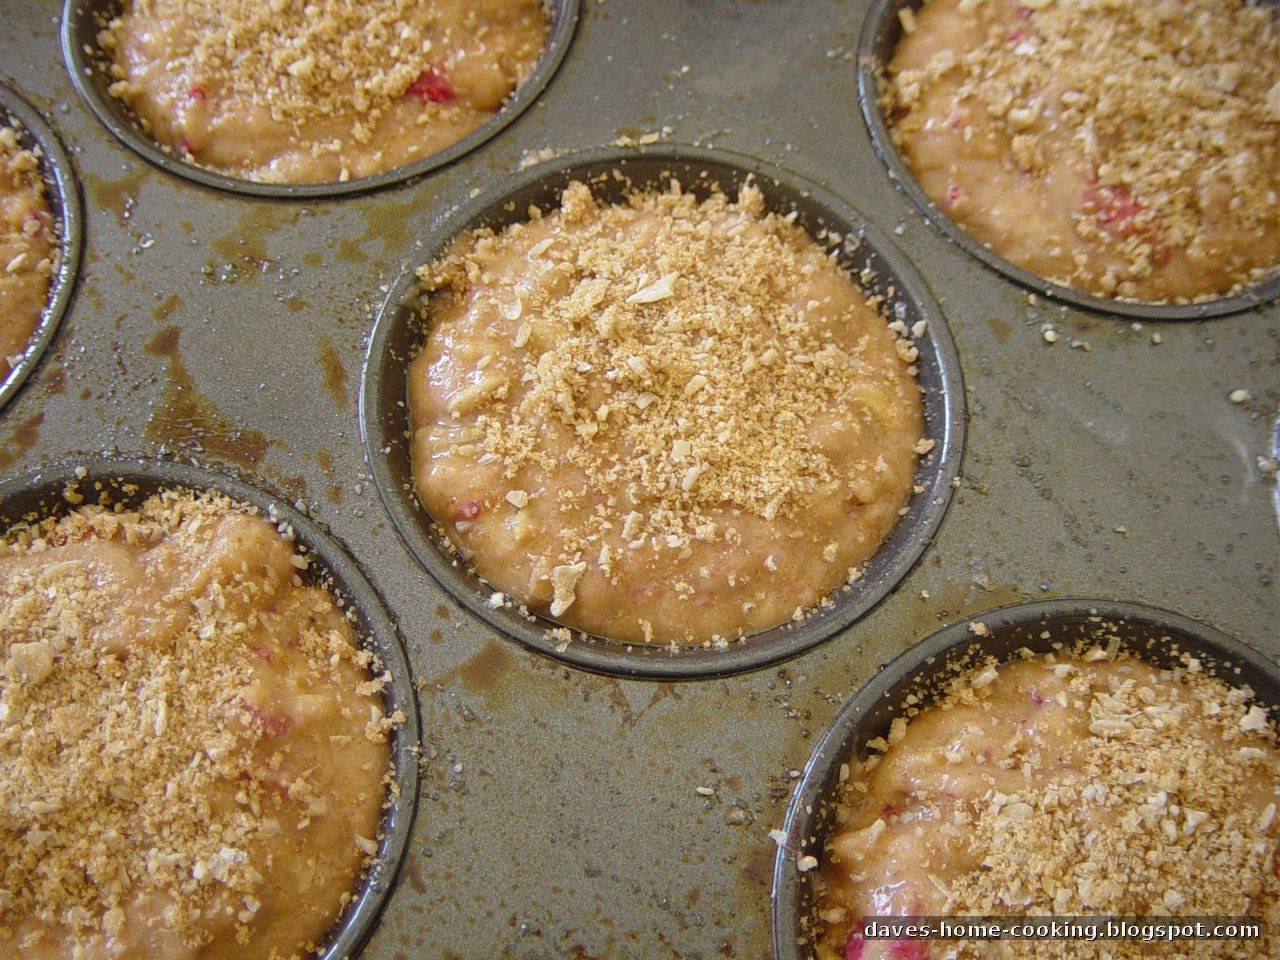
Pour the mixture into the chilled crust. Bake in preheated oven for 40 minutes, or until just set in the center. Loosen the cheesecake from the sides of the pan by running a thin metal spatula around the inside rim. Let cool in the pan for 30 minutes. Chill in the refrigerator, loosely covered, for at least 4 hours to overnight to set.

To Make the Passionfruit Topping:
Combine the cornflour and water in a small bowl. Transfer to a saucepan. Add the passionfruit and extra sugar. Place over medium heat and cook, stirring, for 2-3 minutes or until the mixture boils and thickens. Set aside to cool slightly. Pour over cheesecake. Place in fridge until set.

Thursday, July 15, 2010

Moussaka

I'd never even heard of Moussaka until after I met Teena.  She told me her dad had made it all the time and that it was delicious.  So she bought me some eggplant, found me a recipe and asked me to make her some.  The recipe I use is from Taste.com.au.  I've since made Moussaka several times and Teena was right, it is delicious!  I have also discovered recently that there are several versions of Moussaka. This one that I make is the Greek version with layered egg plant and white sauce, although I use beef mince instead of lamb mince.  There is also a Turkish version which is not layered, but sautéed instead.  And other versions which use zucchini or potatoes instead of eggplant.


Ingredients
  • 2 large eggplants
  • 1/4 cup olive oil
  • 500g beef mince
  • 1 onion, chopped
  • 1 tsp allspice
  • 400g can tomatoes
  • 1/2 cup water
  • 1/4 cup chopped parsley
  • 50g butter
  • 2 tbs plain flour
  • 1 1/2 cups milk
  • pinch of nutmeg
  • 1 egg
  • 1/2 cup grated cheese


Preheat oven to 180°C.  Thinly slice eggplants, then cook in olive oil until golden brown.

Brown mince and onion. Add allspice, tomatoes and water. Simmer for 20-30 minutes. Stir in chopped parsley.  Layer eggplant on the bottom of an ovenproof dish.  Top with a layer of mince.  Repeat until you have used up all your ingredients, finishing with a layer of eggplant. 


Melt butter in a saucepan. Add flour, stir for 1 minute. Whisk in milk and stir over medium heat until it boils. Add nutmeg and egg, stir well.  Pour mixture over the top of your layered eggplant dish and top with cheese.  Bake for 20-30 minutes.

 The only thing I would do differently next time is perhaps bake the sliced eggplant as it really absorbs a lot of olive oil when you try to fry it.  I'll have to it with lamb mince one day as well.

See more great recipes at Foodie Friday.

Thursday, July 8, 2010

Passionfruit Kisses

We had a handful of passionfruit to use up, and came across this recipe for Passionfruit Melting Moments, although we prefer to call them Passionfruit Kisses.  They looked so good we just had to try them!


Ingredients

250g unsalted butter, softened
1 tsp vanilla essence
1/2 cup pure icing sugar
2 cups plain flour
1/3 cup cornflour

Passionfruit filling
60g butter
1 large passionfruit
1 cup pure icing sugar


Preheat oven to 160°C.  Line two trays with baking paper.
Cream butter, vanilla and icing sugar with an electric mixer (or a hand mixer like the one above if you're feeling energetic!).  Once mixture is light and fluffy, add flours and continue to mix until it forms a soft dough.


Roll  small teaspoons of the mixture into balls and place on trays.  Use a fork to flatten each biscuit.  Bake for 15 minutes or until firm.  They don't change colour much so don't go off that.  Cool them completely before adding icing.


To make the passionfruit filling, beat butter until light and fluffy. Stir in passionfruit pulp and icing sugar.  Spoon 1 tsp of the filling onto the flat side of a biscuit and top with another biscuit.  Repeat with remaining biscuits.  Dust with icing sugar.

For us the icing texture was not quite right.  It wasn't fluffy enough, perhaps I didn't beat it enough or something.  It still worked ok and tasted great, but it should have been thicker and creamier.  We will make these again for sure, but I'll try something different with the icing.  The biscuits could have been a bit thinner as well, as when you put them together they can be quite thick.

See more great recipes at Foodie Friday.

Wednesday, July 7, 2010

Missing Comments

Apparently Blogger is having issues at the moment with comments.  I've noticed some comments have gone missing on my blog and some other blogs today.  Hopefully they can fix it soon.

Tuesday, July 6, 2010

Margherita Pizza

It's the middle of winter here in Australia. The nights and morning can get fairly cold, but when the sun comes out, the days can be quite warm.  On the weekend, Teena and I spent a lot of time sitting out in the courtyard in the sun to warm up a bit.  Teena did some crocheting, as I looked through some cookbooks for ideas.  I came across a page about pizza and it's history.  The Margherita pizza's history in particular caught my eye.


"The Margherita, topped with modest amounts of tomato sauce, mozzarella cheese and fresh basil is widely attributed to baker Raffaele Esposito. Esposito worked at the pizzeria "Pietro... e basta così" (literally "Peter... and that's enough") which was established in 1880 and is still operating under the name "Pizzeria Brandi." In 1889, he baked three different pizzas for the visit of King Umberto I and Queen Margherita of Savoy. The Queen's favorite was a pizza evoking the colors of the Italian flag — green (basil leaves), white (mozzarella), and red (tomatoes). This combination was named Pizza Margherita in her honor." - Wikipedia.


As Teena was feeling a bit queasy, she requested some simple food (i.e. no fancy ingredients).  So I decided to make her a Margherita pizza.  We didn't have mozzarella, so I just used tasty cheese.  Normally when I make a pizza I load it with onion, capsicum, mushrooms, and other yummy ingredients.  So making a pizza with only three toppings was unusual for me.  The base was covered with tomato paste, then topped with cheese and basil leaves.  So simple.


I have to admit though, it was very good.  You can really taste the basil, which was picked fresh from our garden, and it's always nice to be able to use fresh ingredients you've grown yourself.  I ended up making four pizzas, eating two and freezing the other two, ready to be cooked next time we feel like pizza. 

What's your favourite pizza topping?

Monday, July 5, 2010

Baked Apple Chips

Whilst looking at other blogs I came across a method of baking slices of apple to make apple chips.  It was so easy that I thought I would give it a go.  Teena also commented that she liked apple chips and I was curious to see what they tasted like.  You can see the original recipe from Patricia at ButterYum.


Step 1. 
Preheat Oven to 200°C / 400°F.
Slice and core apples.  I wanted to do a heart shape in the middle but was having trouble carving it out with a knife.  Then Teena came along showed me the easy way to do it using the apple corer. 


Step 2.
Arrange apples on a lightly greased baking tray.


Step 3.
Pop the tray in the oven, reduce heat to 75°C / 170°F.
Bake for 2 hours.

Our chips came out very crunchy.  You should be able to make them chewier by taking them out of the oven sooner.  I used a sweet apple, Pink Lady, and it was very tasty.  You could really taste the flavour of the apple still.  We might try it again sometime with a different type of apple, probably baking it a little less to make them a bit more chewier and a little less crunchy.

Saturday, July 3, 2010

Stuffed Baked Potatoes

What do you do when you have too many potatoes?  Well, there's a lot of things you could do actually, but we decided to stuff them and bake them!


Most recipes for stuffed baked potatoes have you wrap the potatoes in foil and bake them for an hour before scooping out the flesh and stuffing them.  I didn't have that much time though, so I steamed my potatoes for 10 minutes, let them cool slightly and then scooped the flesh out.  You could also microwave them if you wanted.


For the filling, I just fried up some onion and garlic, added some white butter beans and smushed them up a little.  Spooned the filling into the scooped out potato, added some shredded cheese and baked them for another 20 minutes until the cheese was melted and browned.  They were really tasty too.  Will have to try them again with some different fillings.

Thursday, July 1, 2010

Cauliflower Soup


When out shopping one day we visited a little cafe and ordered some soup.  Teena had Cauliflower and Chilli soup and I had Pumpkin and Coconut soup.  Or maybe it was the other way around...  either way they were both delicious.  Of course we found some recipes to make our own and these are now two of our favourite soups!  So when Teena bought a lovely big head of Cauliflower the other day, she requested I make some soup with it.  The original recipe for this was a Cream of Cauliflower soup, but we rarely have any cream as it's not something we use very often.  We prefer our soups to be chunky and cream free anyway.  There should be some dried chilli flakes in there as well but I had run out of those and didn't have any fresh chillies handy.

Ingredients

1 tbs olive oil
1 brown onion
2 garlic cloves
2 tsp ground coriander
1 tsp ground cumin
1 large head of cauliflower
2 cups vegetable stock
2 cups water


Heat oil in a large stockpot or saucepan.  Add onion and garlic and cook until soft.


Add cumin and coriander, cook stirring for 2 minutes.  Add the cauliflower, stock and water.  Cover and bring to the boil.  Reduce heat to a simmer and cook, partially covered, for 30 minutes or until cauliflower is soft and breaks apart.


Use a potato masher to break up the cauliflower slightly.  This gives it a nice chunky but soft texture, but you can blend it if you prefer it smooth and creamy.

Wednesday, June 30, 2010

Lime and Ginger Cookies


Tati over at Polka Dot Pantry Sweets described these cookies as amazing, and I have to agree.  Teena and I both love them!  Visit Tati's blog if you would like the recipe.


I used a lime from our potted Patio Lime. It was only a small lime though and I think the cookies could have used a bit more lime flavour.


I wouldn't recommend using a hand mixer like this one for making cookies and cakes though...  I think I need to get myself a proper electric mixer.

Sunday, June 27, 2010

Raspberry Spiced Muffins


This is our favourite spicy muffin recipe, I just love the combination of spices and the muffins are just delicious!  I've made a few different variations by changing the type of berries and nuts.  This one uses raspberries and sunflower seeds rather then nuts.  The original recipe was for Cranberry Spiced Muffins which I found while trying to find a way to use up some leftover cranberries.  I use frozen raspberries as that's how we buy them, but you could use fresh if you prefer.

Ingredients
  • 1 cup frozen raspberries
  • 1 tbs white sugar
  • 2 cups self-raising flour
  • 3/4 cup brown sugar
  • 1/2 cup sunflower seeds
  • 2 tsp ground ginger
  • 1 tsp ground cinnamon
  • 1/2 tsp ground nutmeg
  • 3/4 cup milk
  • 1/2 cup vegetable oil
  • 1 egg, lightly whisked
  • 1 tbs sunflower seeds, extra
  • 1 tbs brown sugar, extra


Put the frozen berries into a bowl, sprinkle a little white sugar over the top and add 1 tbs boiling water.


Mix the flour, brown sugar, sunflower seeds, ginger, cinnamon and nutmeg together in a large bowl.  In a separate bowl, combine the milk, vegetable oil and egg.


Pour the wet mix into the dry mix and stir until just combined.


Spoon the mix into a 12 cup muffin tray which has been sprayed with cooking oil.


Put the extra sunflower seeds and brown sugar into a mortar and pestle and mix until the seeds are crushed slightly.


Sprinkle the crushed seed mix on top of the muffins and bake in a preheated oven at 200°C for 20 minutes or until golden brown.


Try to let them cool just a little before tasting :)  What's your favourite muffin flavours?

Friday, June 25, 2010

Pumpkin, Spinach and Eggplant Lasagna

I had planned to make some Moussaka, but I'd used some of the ingredients the night before, so I looked around for a lasagna recipe with pumpkin and spinach in it.  I didn't really find one that I liked, but I had a good idea of how I wanted to do it and I've made traditional lasagna heaps of times.  So I just made a lasagna with layers of all the ingredients I wanted to use, pumpkin, spinach and eggplant.

I was also trying some dried wholemeal lasagna sheets which I soaked briefly in some boiling water before using, but you can use any type.  I like using fresh lasagna sheets as you don't get any uncooked bits in your lasagna.


Ingredients
  • Lasagna Sheets
  • 400g Pumpkin
  • 1 bunch Spinach
  • 2 Eggplant
  • Salt
  • Olive Oil
  • 2 Brown Onions
  • 400g Tin Diced Tomatoes
  • 2 tbspn Tomato Paste
  • 100g Button Mushrooms
  • 1 tbpsn fresh Oregano
  • 1 qty of Bechamel Sauce


Heat some Olive Oil in a frypan and cook onion and garlic until soft.  Add mushrooms and oregano, cook for another minute.  Add tomato paste and tomatoes, bring to the boil then reduce to a simmer for 10 minutes.

Slice eggplant in thin slices and sprinkle with salt.  Heat olive oil in a large frying pan and fry eggplant in batches until brown on both sides.  Transfer to some paper towel.  Peel and slice pumpkin thickly.  Steam or boil pumpkin for about 5 minutes to soften slightly.  Chop Spinach roughly and toss it in some boiling water for a few minutes.  Transfer to some paper towel to drain.  Squeeze out extra moisture before using.

In a large dish, spoon a thin layer of the tomato sauce on the bottom.  Add a layer of lasagna sheets then top with a layer of eggplant, a layer of spinach, followed by a layer of pumpkin.  You don't have to fill each layer, just scatter evenly.  Add another layer of lasagna sheets, followed by the tomato sauce and then eggplant, spinach and pumpkin.  Repeat like this until you have used up all your ingredients.  I managed to build three layers with mine.

Top with a layer of lasagna sheets and finish by pouring the bechamel sauce over the whole lasagna.  Cook in oven at 180°C for 30-40 minutes, or until the lasagna sheets are soft when tested with a skewer.  I forgot to put any cheese into my bechamel sauce... and if I had remembered I probably would have scattered some on top as well.  It was still very tasty though!

Wednesday, June 23, 2010

Differences

I love the internet.  Mostly because you can get information about anything with the click of a button, but also because it allows people from all over the world to share their lives with each other.  It allows us to share ideas and discover new ways of doing things.

For example, I used to play online games with friends who live in America (I live in Australia).  During this time, one of my friends, Chris, would often say he was going to make some PnJ on toast.  I had no idea what he was talking about and when I asked him what PnJ was, he was amazed that I didn't know and was quite happy to share something that appears to be a part of American culture.  Of course most of you probably know that PnJ is Peanut Butter and Jelly.


In Australia, Jelly is a crystalised powder that, when mixed with hot water and then chilled, turns into a gelatin dessert (something like this).  Something which I believe is referred to as Jello in the US?  You can imagine my thoughts at the time as I pictured a peanut butter and jello sandwich...  until I worked out that jelly in the US is what we call jam in Australia.  I have since tried PnJ many times and agree that it is rather tasty!


Another difference that came up was with pumpkin.  I would often tell the guys that I was cooking a roast dinner with roast potato and pumpkin.  Pumpkin as a main course??  Pumpkin is a dessert they would tell me.  A dessert??  No way, you guys are weird!  Afterwards, Chris told me all about pumpkin pie and said I had to try it.  In Australia, we traditionally boil, steam or roast pumpkin and eat it as a vegetable with our main course, so the concept of pumpkin as a dessert is a little strange and unfortunately I have yet to try one.  So if anyone has a good recipe they would like to share, let me know :)


So thank you internet, and thanks to all the blog writers out there for sharing just a little bit of their lives.

Tuesday, June 22, 2010

Meatballs in Rich Tomato Sauce with Spaghetti

This is our favourite Meatballs and Spaghetti recipe.  The meatballs are just so tasty and it's very easy to make.  The recipe is adapted from one I found at Taste.


Ingredients
  • 500g beef mince
  • 1 onion, finely chopped 
  • 1-2 tablespoons hot chilli sauce
  • 1 tbspn lemon juice
  • 1 cup fresh white breadcrumbs
  • 1/3 cup basil leaves, finely chopped
  • 2 x 400g cans diced Italian tomatoes
  • 1 cup vegetable stock
  • 1 tbspn sweet chilli sauce
  • cooked pasta and extra basil, to serve

Combine beef mince, onion, chilli sauce, lemon juice, breadcrumbs, basil and salt and pepper in a large bowl. Roll small handfuls of mince mixture into balls. Place meatballs on a tray lined with baking paper. Cover and refrigerate for 15 minutes or until firm.


Combine tomatoes, sweet chilli sauce and stock in a deep frying pan. Try to use something that will fit all meatballs in a single layer and allow the sauce to cover them easily.  Bring slowly to the boil over medium heat. Drop meatballs into tomato mixture. Reduce heat to low and simmer, uncovered, for 25 to 30 minutes or until meatballs are cooked through.

Serve meatballs on top of freshly cooked spaghetti.  Enjoy!

Monday, June 21, 2010

Apple Dumplings

I saw these Apple Dumplings while flicking through Australia The Beautiful Cookbook.  They just looked so interesting that I had to try them.  They were really tasty too.  The apples just seem to melt inside their crust and hidden inside somewhere was the sweet pile of honey and walnuts.  The original recipe used golden syrup instead of honey and made a quantity of 4.  I reduced the ingredients to only make 2.


Ingredients
1 cup plain flour
Pinch of salt
1 tbspn sugar
60g butter
2 tablespoons iced water
2 Granny Smith apples
1 tbspn honey
1/2 cup chopped walnuts
1 egg, beaten
Extra sugar

Combine flour and salt in a large bowl, stir in sugar.  Rub in butter with your fingertips until the mixture resembles coarse breadcrumbs.  Sprinkle water over the top and mix with a knife to a firm dough, adding extra water if it's too dry.  Wrap in plastic film and chill for 30 minutes.


Divide dough into two pieces and shape each piece into a ball.  Roll out on a lightly floured surface to a large circle large enough to wrap around the apples.  Peel and core apples.  Mix honey and walnuts together and use to stuff apples.  Place an apple on each pastry square, dampen edges of pastry and wrap around apple.


Place dumplings seam side down on a greased baking tray.  Brush with beaten egg and sprinkle with sugar.  Bake in oven for 20 minutes at 200°C.  Reduce heat to 180°C and bake for a further 30 minutes or until apples are soft when tested with a skewer.  Serve dumplings warm with custard or ice-cream.


We really liked these, they were really yummy and not that hard to make either. We'll be making them again for sure, perhaps with some different nuts next time.

Related Posts Plugin for WordPress, Blogger...